 I had a roommate at the University of Washington (go Huskies!) who was always studying. She would come home late, sing in the shower at the top of her lungs, not caring who heard, make a quick dinner, then go to sleep, only to repeat the process the next day.
She went through several weeks where she’d make spaghetti at home. She’d come home from studying, throw flour and water into a bowl, mix and cut, and boil the noodles. It took all of thirty minutes before she had a meal.
So why am I sharing this story?
To illustrate just how easy it is to make pasta from scratch!
Making good pasta from scratch doesn’t have to be intimidating—the ingredients are minimal and so are the steps! Granted, it is a little more complicated than my roommate’s, but once you have the basics, it’s something you can repeat without a recipe. Think of it as something you can pull out whenever you feel like it, whip it up quickly, throw a sauce together, and you’ll have a meal to impress!
You don’t need any special techniques and you don’t need any special tools to make fresh pasta, although I’ll show you a few in this blog. I promise the taste of fresh pasta is completely worth it!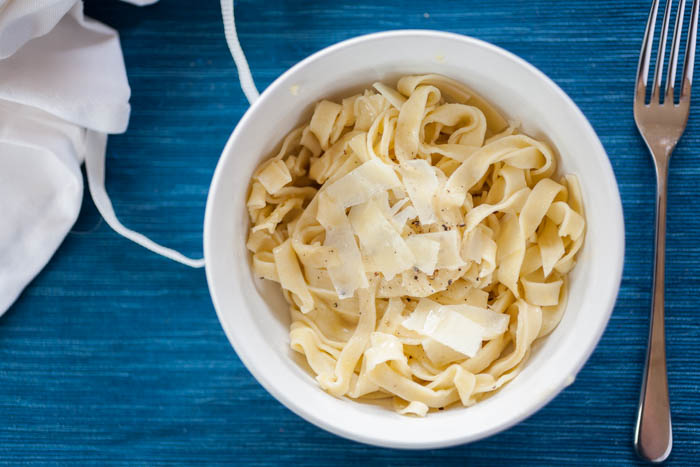
So let’s get to it!
The Ingredients
I played around with two different recipes along with my own, one from a cookbook and the other from a website, to see what would work better. I found that, in my kitchen, the best recipe was:
- 2 ¼ cups of flour
- 2 whole eggs and 4 yolks
- 3 tsp. of olive oil
- 1 tsp of fine-grained salt (the crystals can’t be too large, otherwise you’ll have salt “bumps” in your pasta)
You may find that your dough is too wet or too dry. If so, play around with the amount of flour, olive oil, even eggs. Add a tablespoon of flour, or take away a ¼ cup. Add a teaspoon of olive oil. It’ll all about figuring out what works best for you in your kitchen.
The Flour
There are three types of flour you can use to make pasta: all-purpose, semolina, and “00” flour. All-purpose is probably already in your pantry, which means it’s easy to get to and easy to use. It makes very good pasta.
“00” Flour is high in protein, and so makes a silkier pasta. Durum semolina flour makes rougher pasta, which is perfect for making a pasta sauce to which it really clings.
Which one you use it up to you! You can even try all three to see which one you like better.
Whichever flour you use, you will need to both knead and rest the dough. Why? Kneading the dough helps develop the strands of gluten within the dough that hold it together and give it a silkier texture. If you don’t knead the dough and try to roll it out, it will end up shredding. Resting the dough gives the gluten time to, well, relax after being stirred up. If you move straight from kneading to rolling out, the dough will be extremely tough to work with. You’ll find it won’t roll out properly, or even spring back instead of staying rolled out.
The Tools
Just like the ingredients, there aren’t too many tools needed to make pasta. You’ll need:
- A large cutting board or mixing bowl
- A rolling pin or a pasta machine
- A knife (if you don’t have a pasta machine)
- A large pot
It is easier to make pasta if you have a pasta machine (this is the pasta maker I have, gifted to us for our wedding by a wonderful friend from college and her husband!), but it’s not too much more trouble to use a rolling pin and a knife. The pasta strands just won’t be as exact.
The Pasta Making
For the traditional technique: mound the flour onto the cutting board, or in a bowl, and make a well in the middle: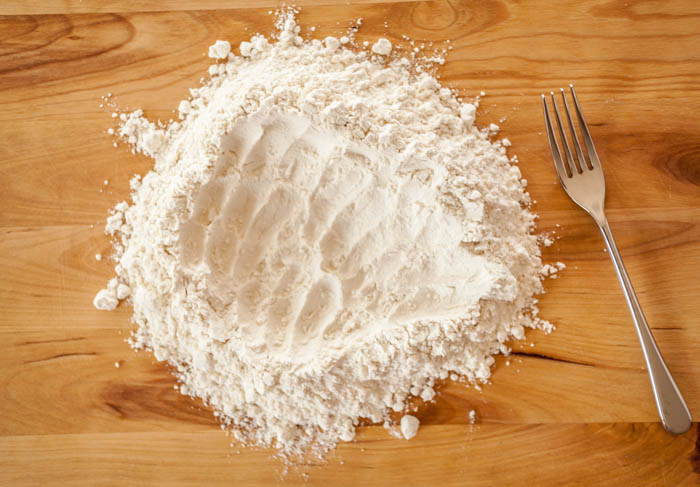
Add eggs, salt, and olive oil into the well, then begin bringing bits of flour into the middle and mixing it all together with you’re a fork or your hands: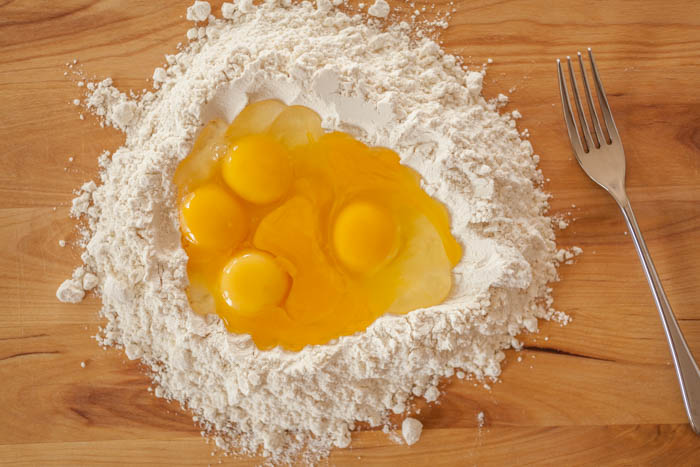
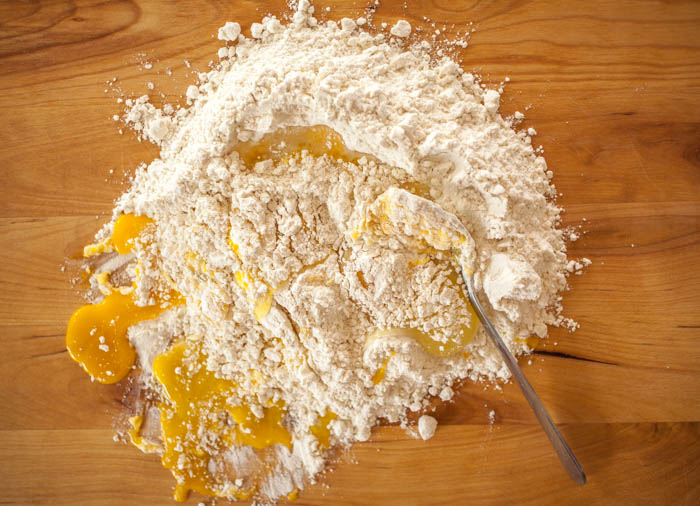 Keep bringing in small mounds of flour until it’s all mixed together:
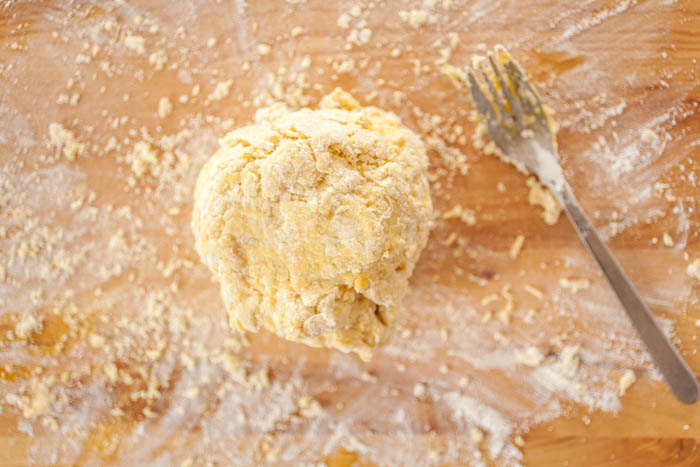 Form a ball, then begin kneading the dough. Knead the dough for 5 to 10 minutes, until the dough is really smooth. For me, this took about six minutes, but I live in the high desert where it’s very dry, and that will affect how wet or dry your dough is. If the dough sticks to your hands, you can add more flour, or if it’s really dry (meaning it isn’t coming together at all). I usually recommend adding just a little at a time, maybe a few tablespoons. The dough should be very smooth, like this:
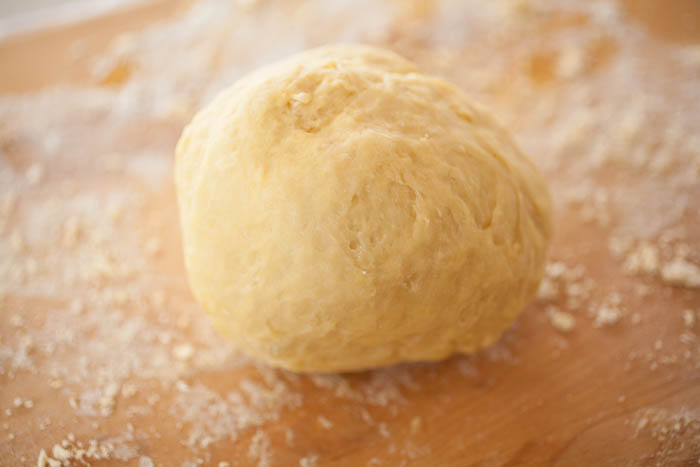
Once the dough is smooth, cover it with a towel or plastic wrap and let it rest for an hour. Once the dough is rested, squish it down into an approximate rectangle: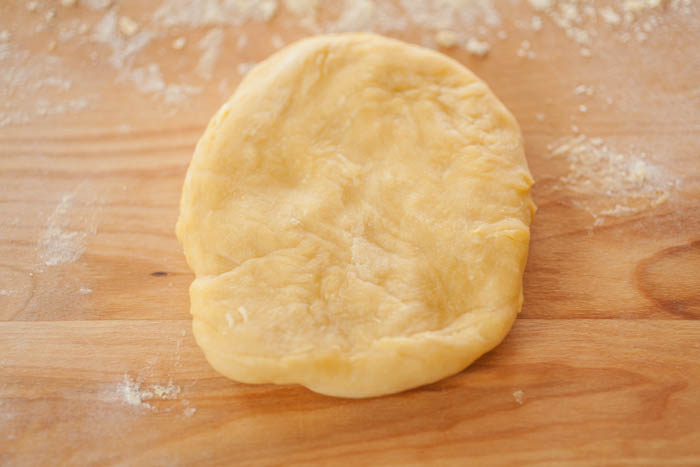
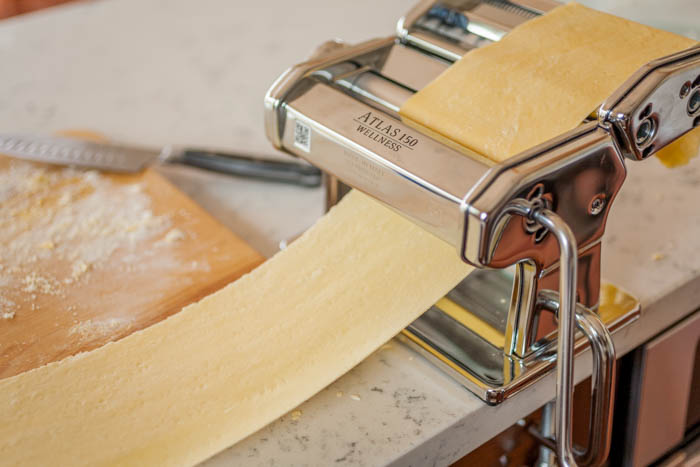
From there, you can roll out the dough with either a rolling pin or you can run it through the roller part of the pasta machine. Every time you run the piece of dough through, turn the knob to the next size so it gets thinner and thinner (for me, usually 1 through 6). You’ll want to get the dough thin enough that you can see the outline of your hand through it, like so: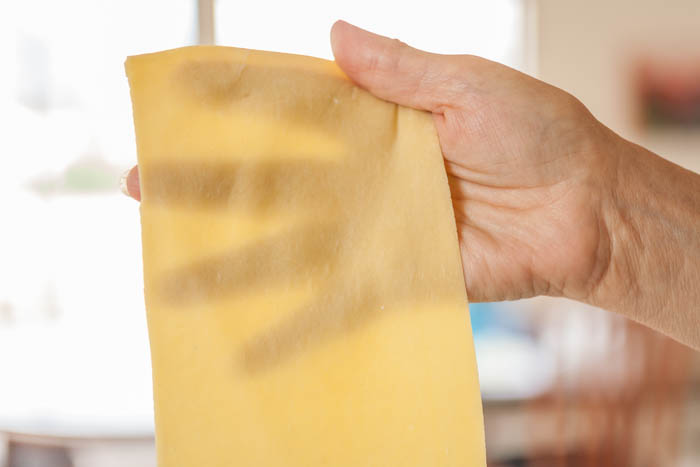
From there you can put it through the cutting part of the pasta machine: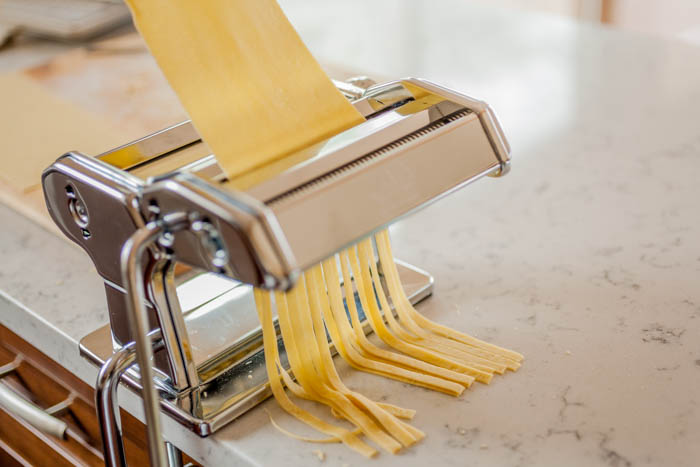
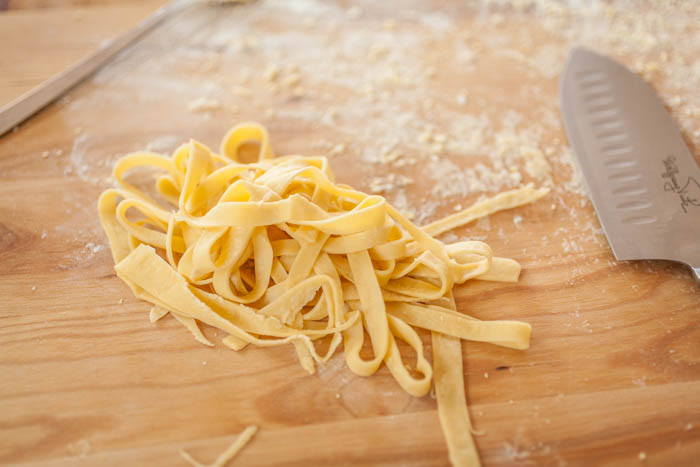
You can also fold the dough gently into a rectangle and cut it into strands, like so: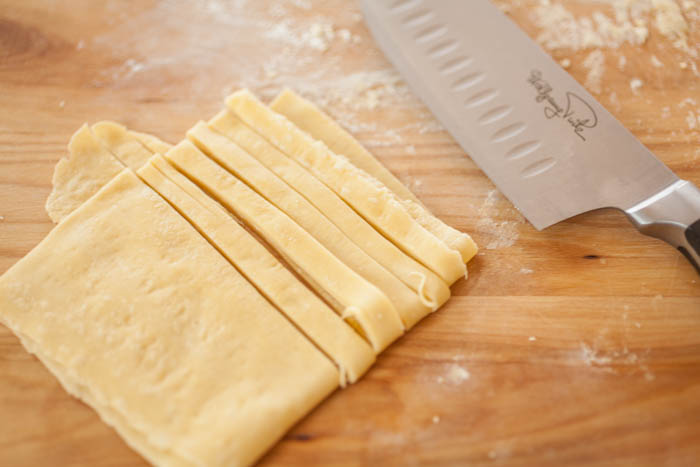
Bring a pot of salted water to a boil (you can find the amount of salt in part two of part two of my pasta primer). Fresh pasta cooks very quickly, about 60 to 90 seconds (test a strand by eating it before draining the pasta).
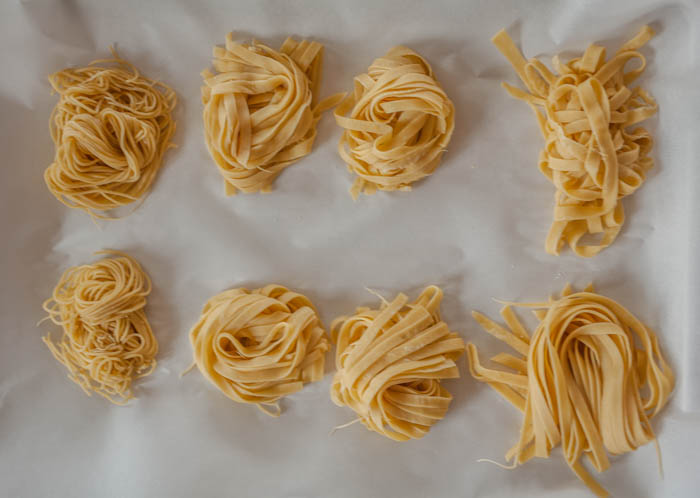
A note: If you’re not going to cook your pasta right away, please don’t coil it into little birds’ nests like I did. It looks nice in pictures, but they dry and clump together and are impossible to separate. Yes, I learned that the hard way…
Instead, you can either lay them out in long strands on a parchment paper- or foil-lined baking sheet, or hang them up on a pasta drying rack.
Once the pasta is dry, you can wrap it up in saran wrap or in an air-tight container and store it in the fridge for up to two days. In the freezer it will keep for about two weeks. 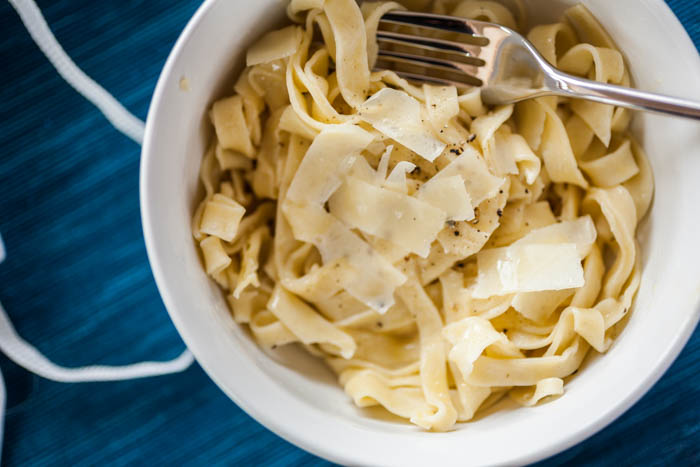
Next Monday I’ll be sharing a recipe for an easy tomato sauce you can use with your homemade pasta (you may see a change in the blog as well)! And check back on Friday for something new: Friday Tips!
‘Till next time!
This is a great tutorial for making pasta – I love it. Plus, I love that you give directions for doing it without a pasta machine – although I think if I made it a few times I would consider getting one. Nothing better than fresh pasta – yum!
Hi Becki! Thanks for reading and commenting! I’m glad you liked the tutorial. Making pasta either way is fun, but I’ll agree with you–it does make it easier with a pasta machine when you make it often (plus, it is fun).